Introduction
Welcome to the exciting world of numerical instruction programming! Let’s dive into this fun and challenging journey together!
To get started with programming on the Steamania JoyKit V2, you’ll need a basic understanding of number systems – how numbers are named and represented scientifically.
Using this guide, along with the user manual and examples available on our website, you’ll become comfortable with the Steamania JoyKit V2 programmer. Soon, you’ll be creating your own programs, building cool electronics, mechanical systems, and functional toys – all within the realm of engineering!
While having a computer can be useful for planning and designing, it’s not required for all Steamania projects. Let’s kick things off by exploring the JoyKit hardware and its optional electronic modules – your hands-on adventure begins now!
Electronic Modules, Parts and Extensions
The Steamania Joykit V2 already includes built-in communication or driver programs for certain modules, supporting components such as the W25qxx storage module and JDY-10M-2.3 Bluetooth module. On the I2C bus, in addition to the SSD1306 OLED display screen, it is also compatible with loading the following modules during startup: the ADS1115 analog-to-digital conversion module, RTC_DS1307 clock module, TCS34725 color recognition module, BMP/BME280 temperature and humidity sensor, as well as the PCA9685 PWM module. Additionally, the board features a built-in buzzer and several buttons that can be used in your programs.
| Module | Remarks | Module | Remarks |
|---|---|---|---|
| Buttons | Push Switches | Digital IOs and PWMs | On-board Pins |
| LEDs | 8x Single Colour LEDs | WS2812B Series | 1x Full Colour RGB |
| Buzzer | 3.3V PWM Driven | Flash | W25QXX Series |
| Bluetooth | JDY-10M-2.3 | User Interface | TFT LCD 800x480 |
| AD Conversion | ADS1115 | 0.96" OLED 128x64 | SSD1306 |
| Temp., Humi. & Alti. | BMP/BME280 | RealTime Clock | RTC_DS1307 |
| Colour Detection | TCS34725 | PWM Generators | PCA9685 |
The Steamania Joykit V2 has integrated drivers for several electronic modules, including the W25qxx storage module and JDY-10M-2.3 Bluetooth module. On its I2C bus, in addition to supporting the SSD1306 OLED display, it is also compatible with loading multiple peripheral devices during startup, such as the ADS1115 analog-to-digital converter, RTC_DS1307 real-time clock, TCS34725 color sensor, BMP/BME280 environmental sensors, and PCA9685 PWM controller. The board also features a built-in buzzer and several user-accessible buttons for interactive control in your programs. Furthermore, it provides a variety of I/O connectors to enable flexible interfacing with additional components or external devices.
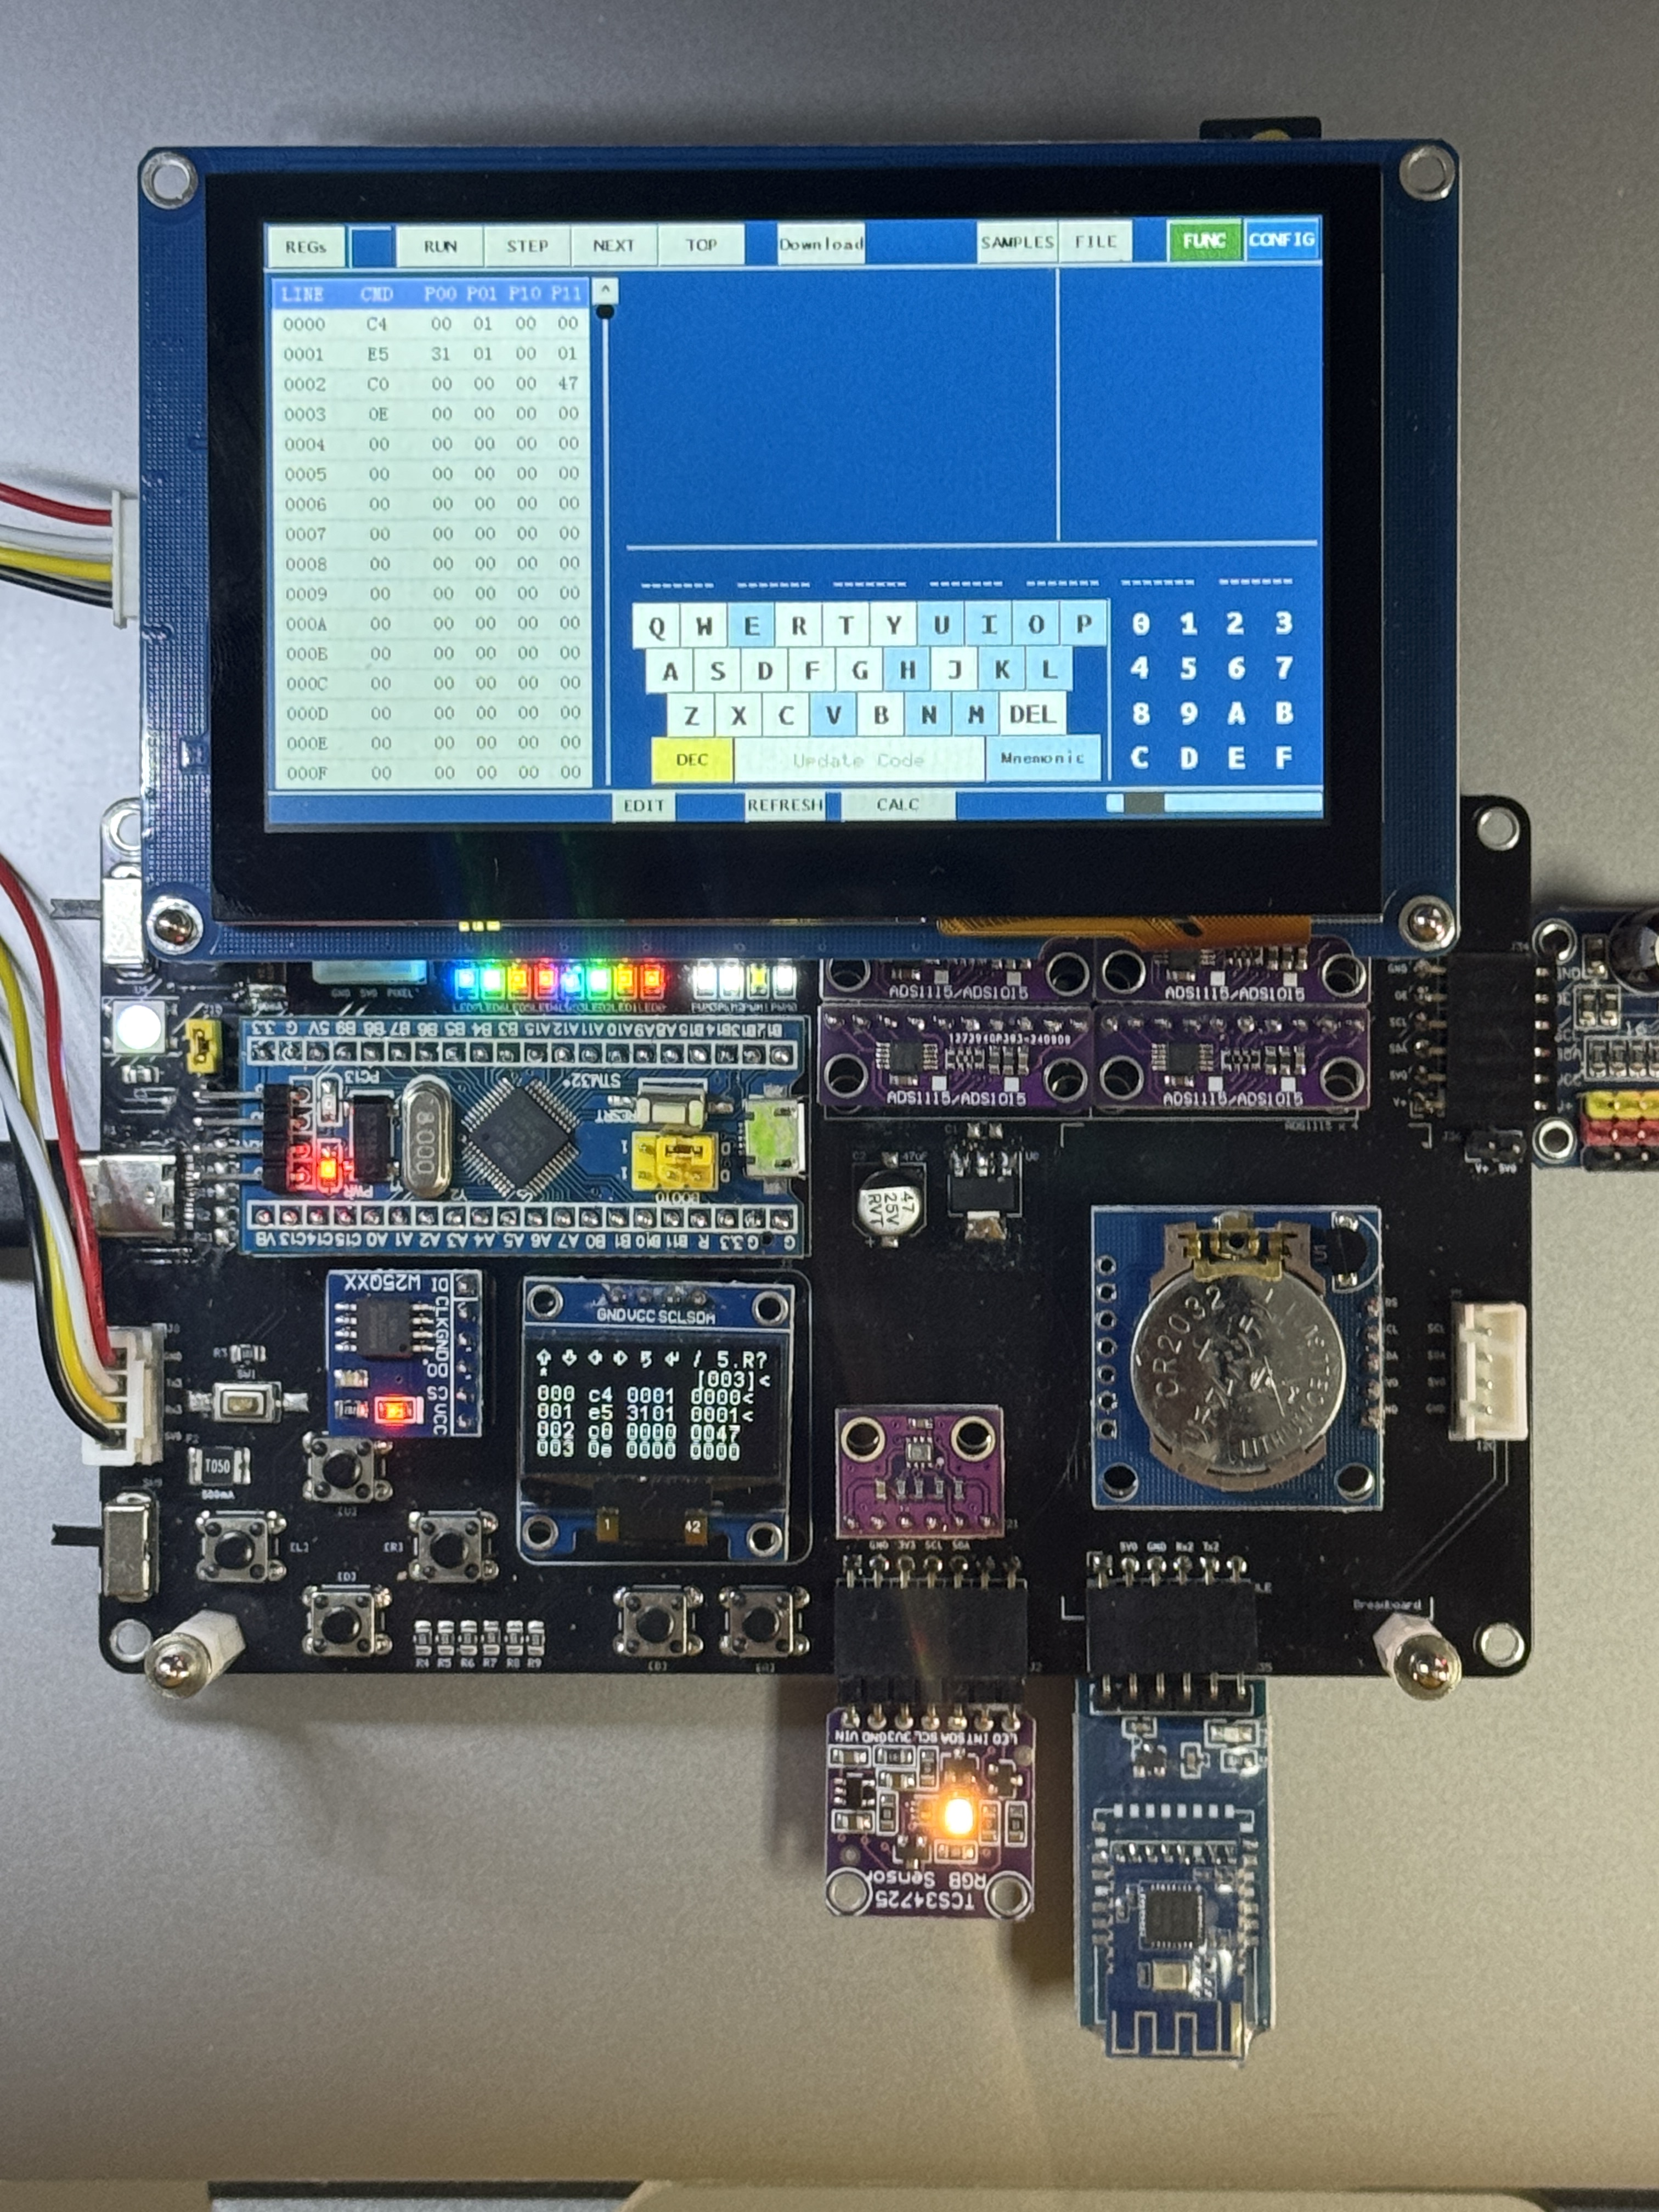
The V2 hardware has undergone a significant upgrade in its interaction mode, transitioning from the previous "LCD1602 display + button" interface to an innovative main screen operation with high resolution (800x480). This major advancement not only brings more intuitive control and graphical interaction but also opens up new possibilities for programming. Users can now enjoy more efficient and precise control through the main screen, coupled with vivid feedback via rich display features, adding endless creative potential to the development process.
With the Steamania Joykit V2, every line of code you write on the main screen is instantly transmitted to the processing core when you click confirm! Now, you can run and debug programs directly right there on the main screen interface—making coding more interactive and fun than ever before.
The processing core still features a classic OLED display as an information panel, allowing you to monitor program status with just a glance. Through this info panel, you can easily check if your code is ready to go. Even cooler? You can use the LCD screen to store and retrieve programs or even test peripheral modules—all while enjoying the seamless interaction of the touch interface.
Let’s dive into the main screen interface and discover all the exciting possibilities it brings to your programming projects!