Exploring the UI
1. User Interface
The device is equipped with an 800x480 resolution main screen, which consists of multiple pages. Users can switch between the Code Page, Function Page, and Configuration Page by tapping the button in the upper-right corner or swiping left/right. The main screen will directly enter the Code Page upon startup.
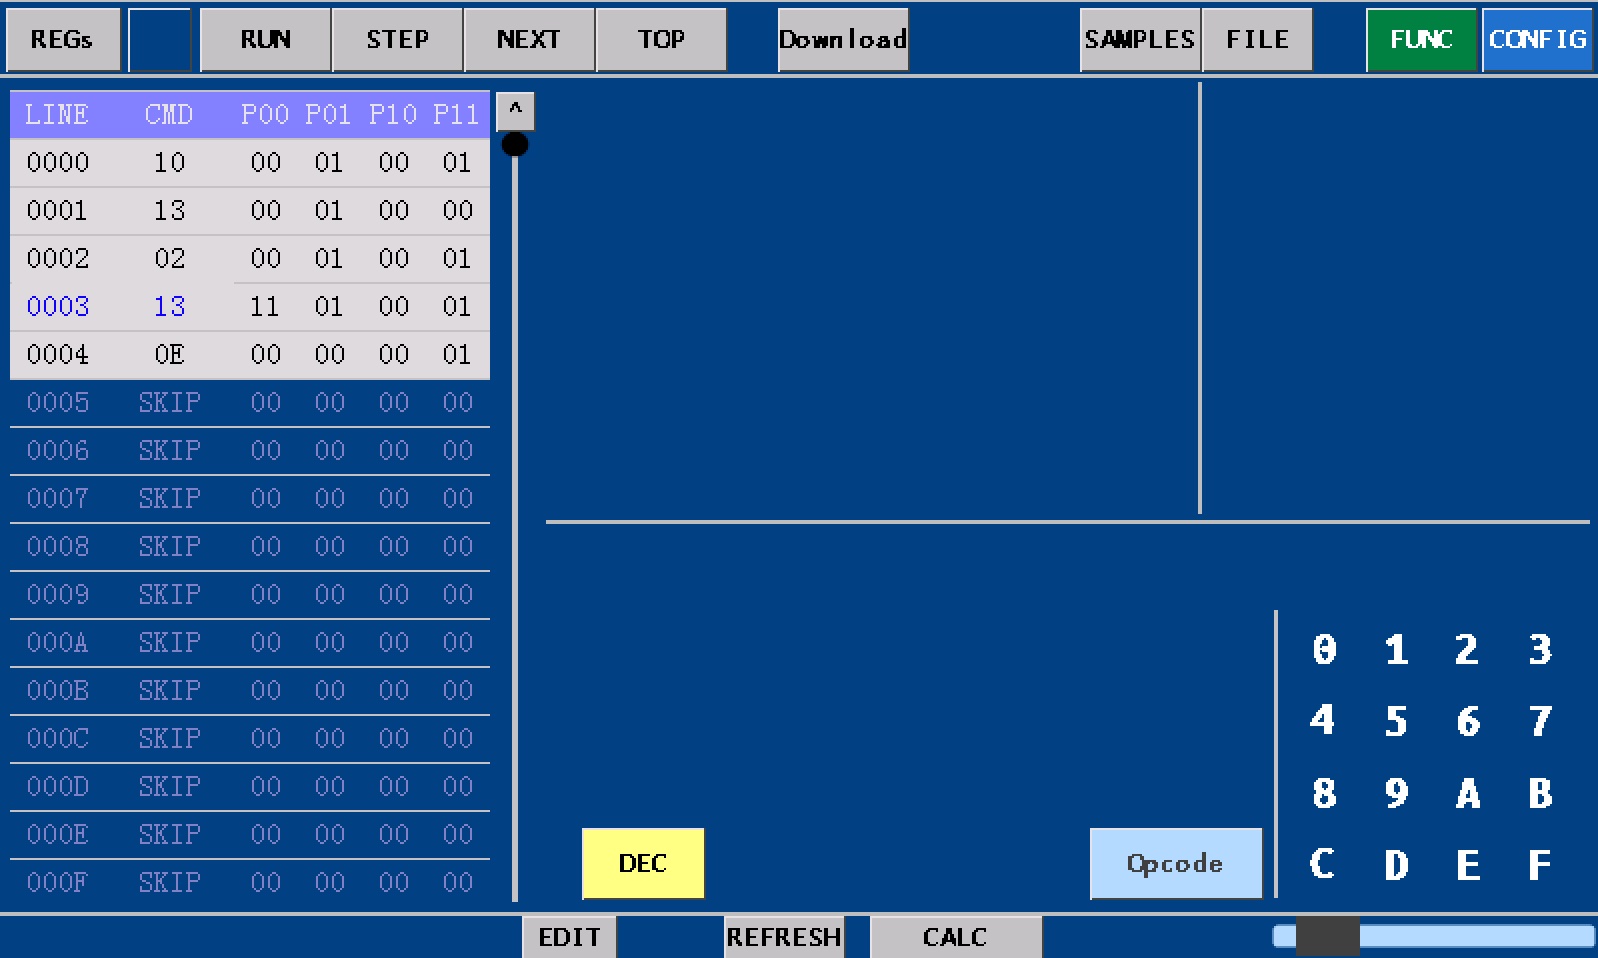
The code page contains:
- Program list
- Register list
- Keypad/Keyboard
1. Code list
The code list displays the code currently stored on the main screen. Stored code must be uploaded to the core board to execute effectively.
The code list also serves as an editing area. By activating the edit mode via the "Edit" button, users can modify each line of code.
Edit Mode
When edit mode is enabled, users can directly click and edit code lines in the list. Line numbers are non-editable. In operand mode, a hexadecimal keypad is used to modify operand and parameter values. During value input, the "DEC" button toggles real-time display of 8-bit/16-bit parameters in decimal format. The Edit Mode is shown below.
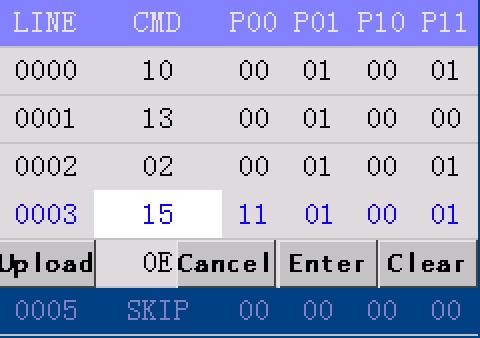
Click the upload button to upload the lines from 000 to the current line to the core MCU.
Click the cancel button to give the the changes and keep the old values of opcode and parameters.
Click the Enter button to confirm the changes and upload the line to the core MCU.
Click the Clear button to reset the opcode and all parameters to 00.
Click the opcode/parameter again to highlight the cursor and re-enter the value.
Confirming Changes
When the "Enter" button is clicked, the modified program line is immediately uploaded to the core board. Users can verify the updated code in the corresponding line number on the core board’s program page.
- Programs can be viewed on the OLED screen.
- Use the [U] ("Up") and [D] ("Down") buttons to scroll through pages on the MCU board.
- How about the LCD ..?
2. Register List
The register list allows users to view current register values on the core board. Click the "Register" button to switch from the code list to the register list.
- Click the register list to manually refresh register values.
- Enable automatic register refresh, which updates values at a fixed interval of 1000ms.
3. Keypad/Keyboard
Numeric Keypad
In Oocode Mode, the Hexadicimal keypad is available for both the opcode and the parameters.
Activate Edit Mode by clicking the EDIT button, then click on a line of code to edit.
QWERTY Keyboard
The QWERTY Keyboard is only available in Mnemonic Mode. In this mode, users do not need to remember the machine opcodes, instead, mnemonics with meanings are used to represent them.
Currently Mnemonic Mode is a customized mode and is available on LXP devices.
4. Run and Debug
Use RUN, STEP, NEXT and TOP to run/stop and debug the program.
- Click the
RUNbutton to start the program on the core MCU, meanwhile the text turns to "STOP" - Click the same button to stop the program
- Check Page 5 on the OLED for the program counter
- Click
STEPbutton to enter debug mode - Click
NEXTbutton to excute the current line
Click TOP button to confirm the changes and upload the line to the core MCU.
...